Disclosure- We were sent this product in return for a review
My girls are all about being pampered, from face masks down to pedicures. They especially enjoy having their fingernails painted and will often come up to me with a bottle of their favourite colour varnish. Like myself, they are also big lovers of anything glittery and sparkly which is where Shaky pop nail studio becomes super ‘handy’ like what I did there?
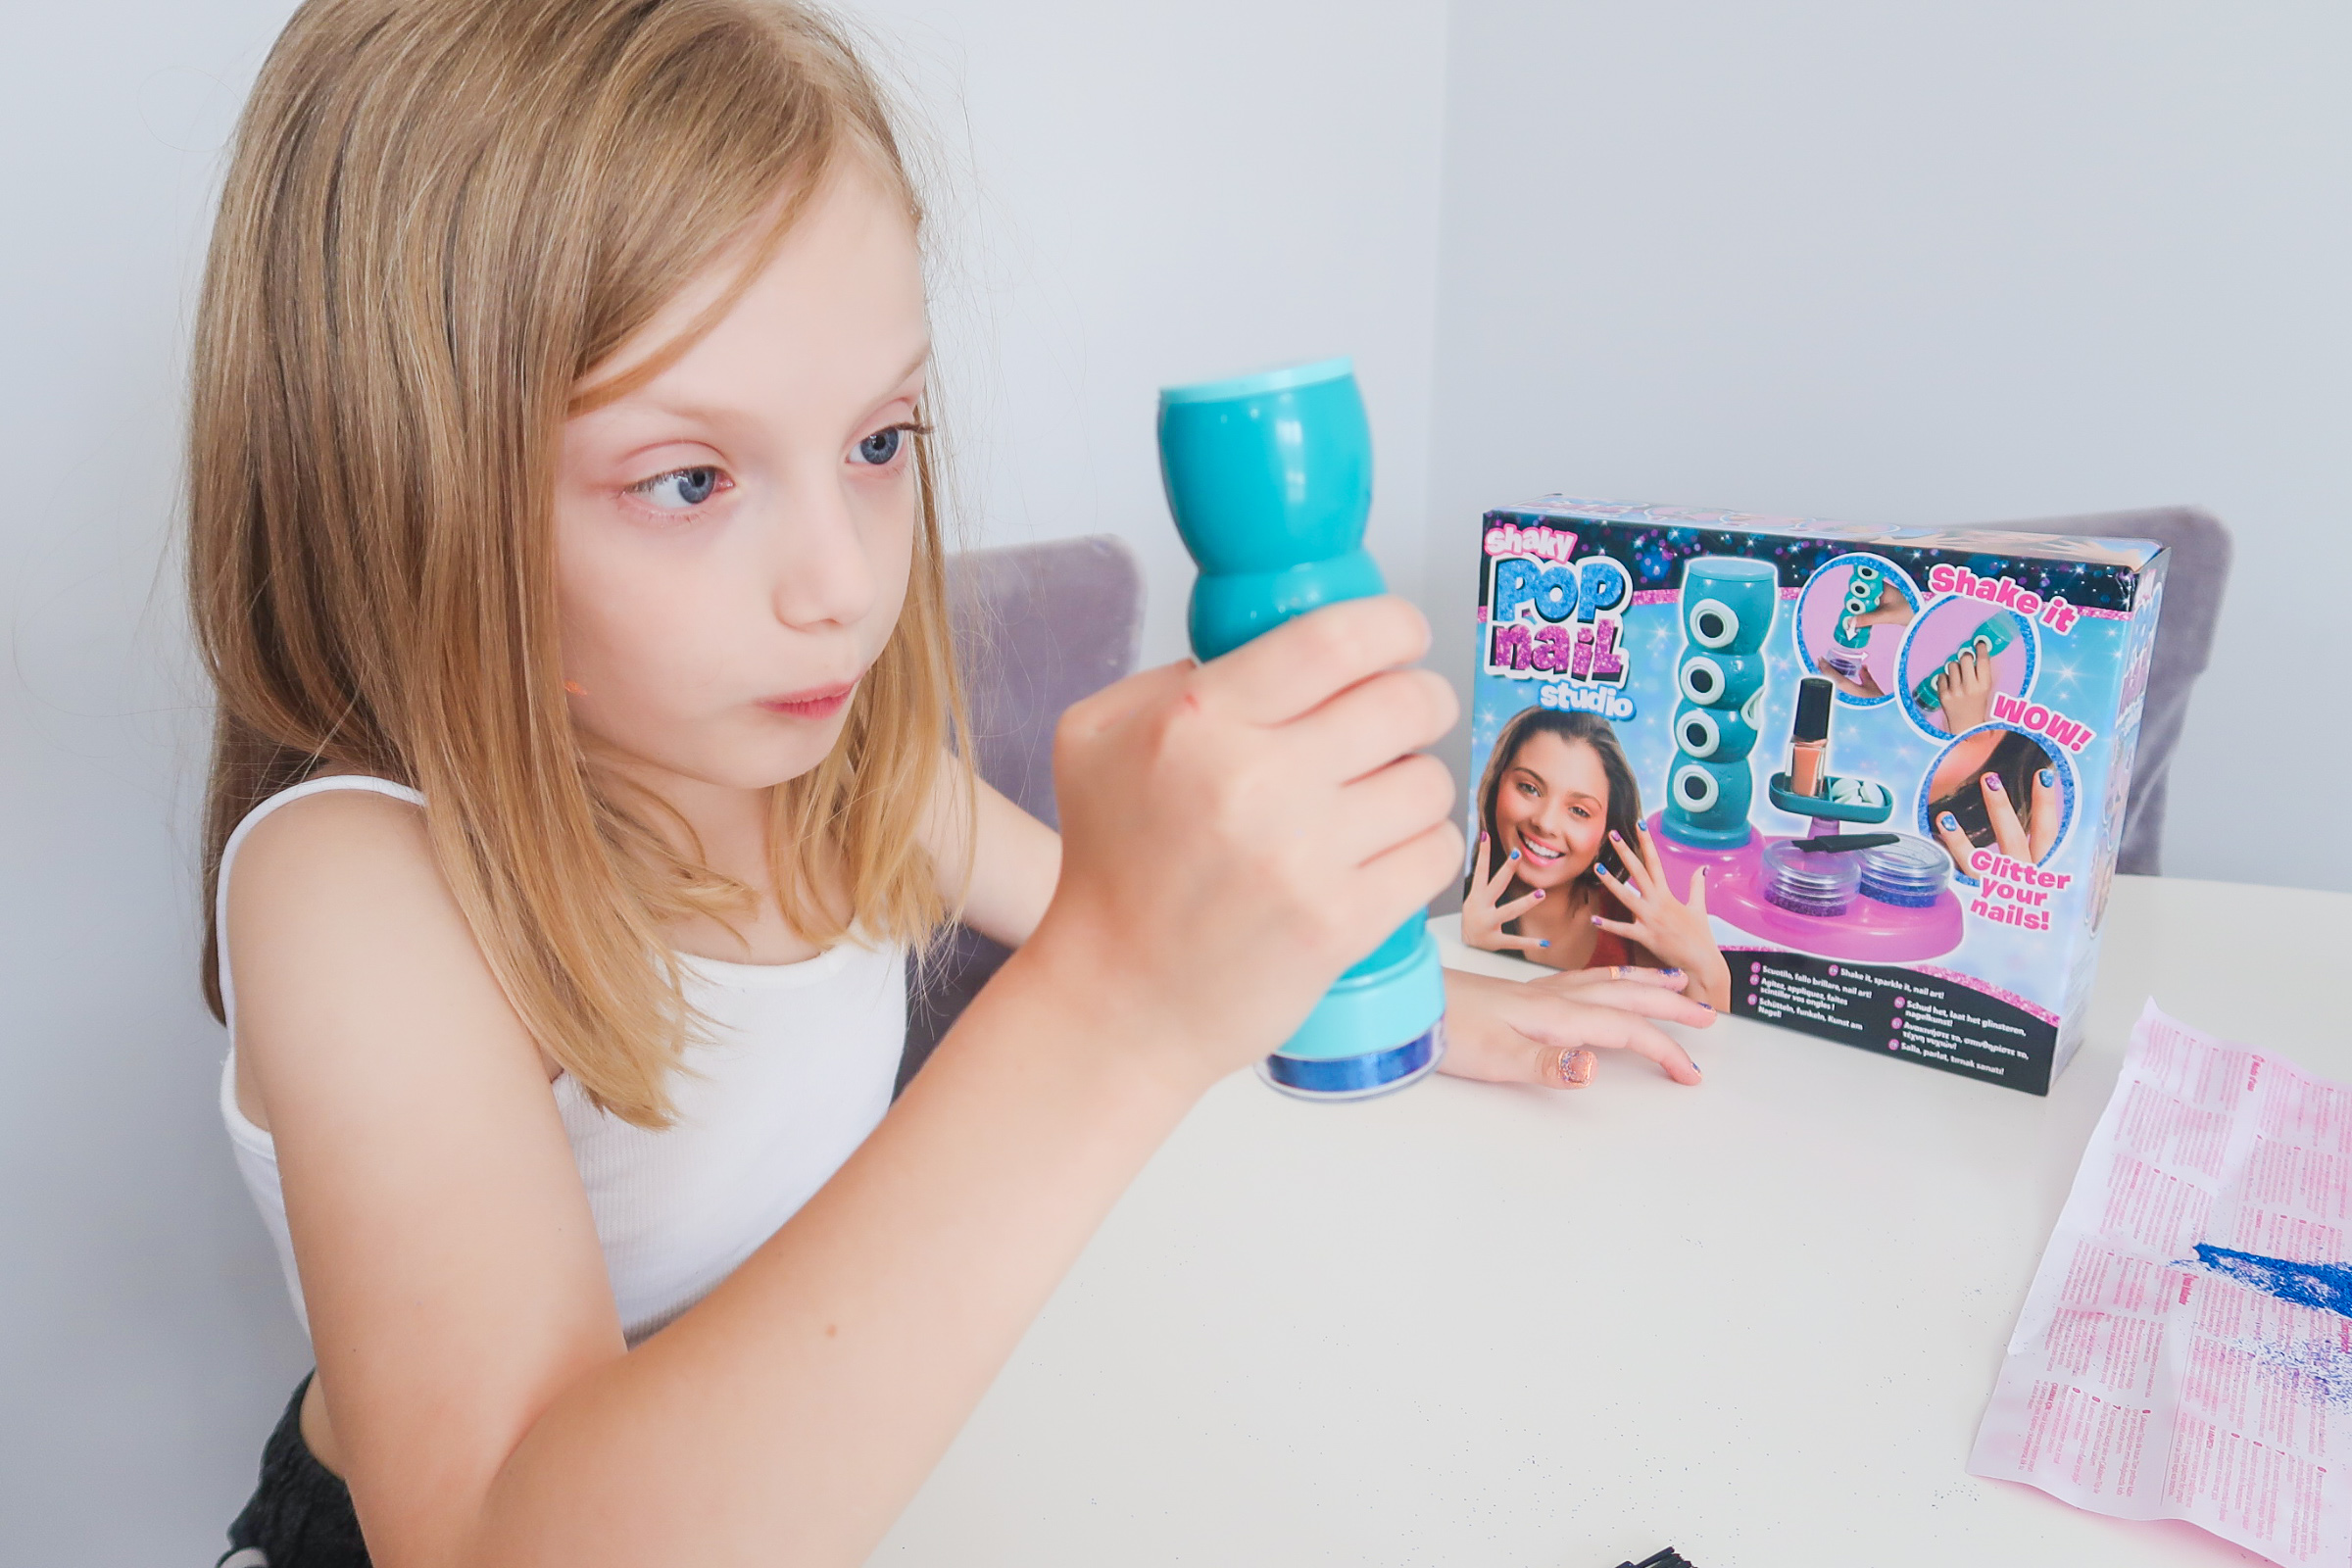
What is Shaky Pop nail Studio?
Shaky pop Nail studio is a unique style and beauty range for young girls and boys that captures fashion and beauty trends and transforms them into cool aspirational toys. Suitable for 8 years and above.
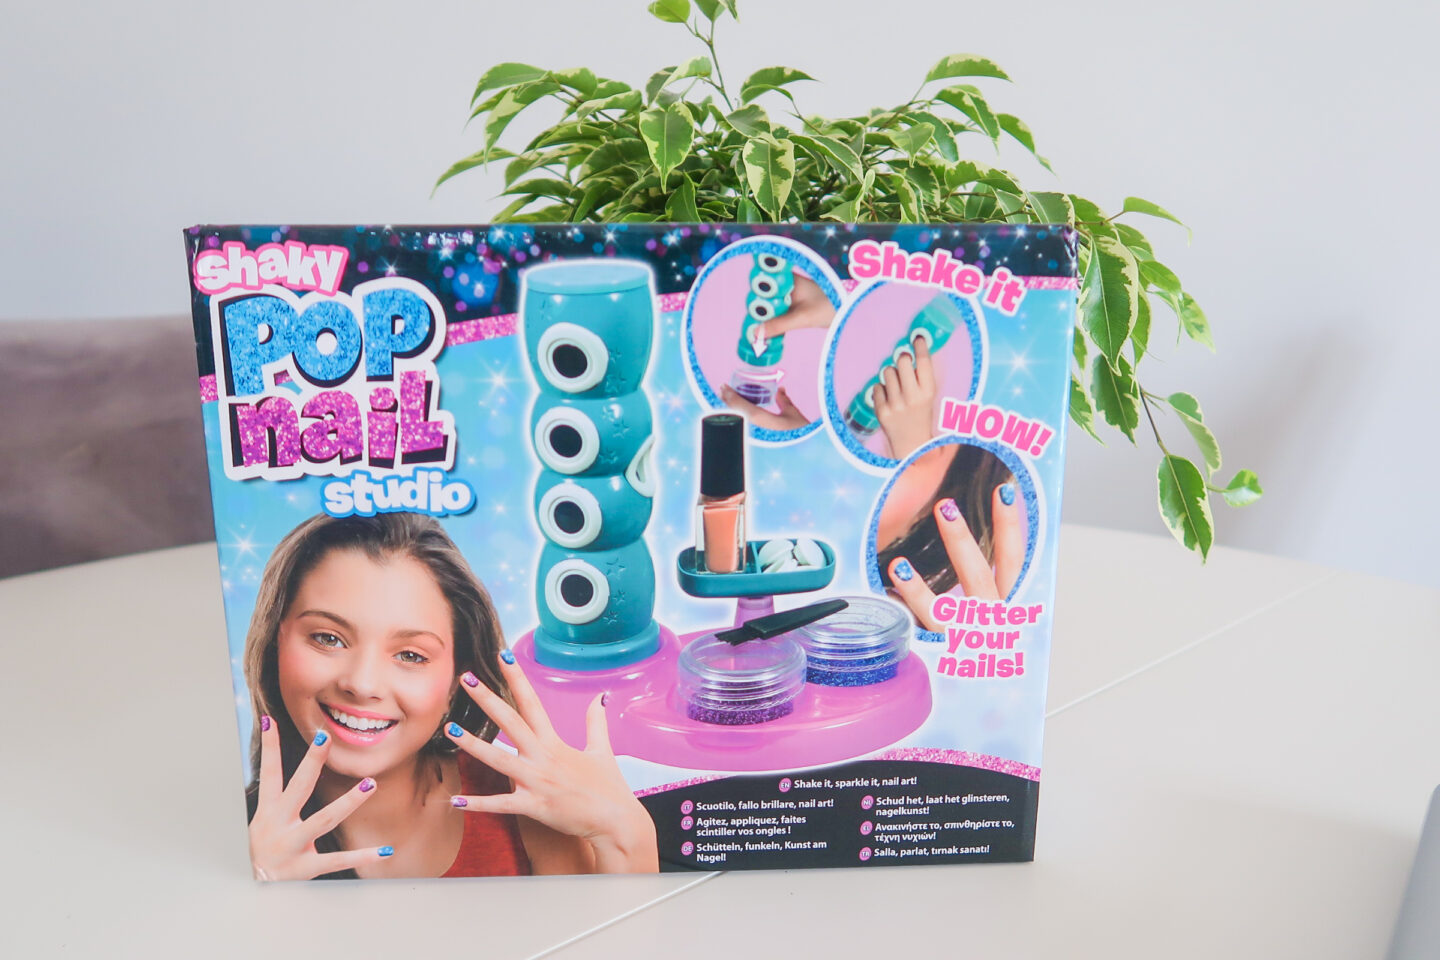
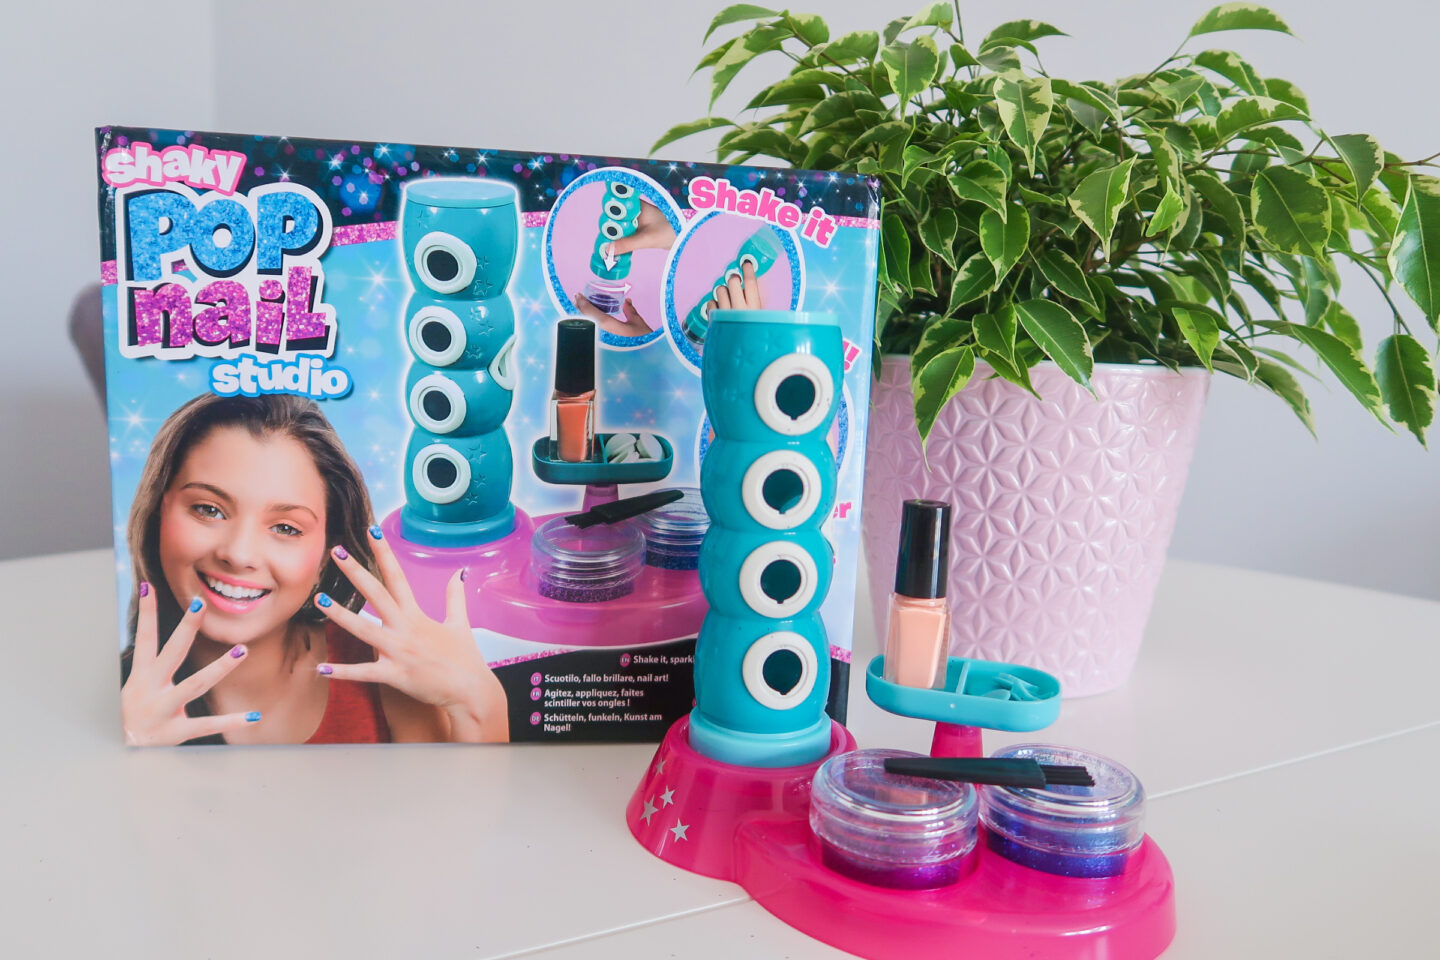
What’s in the box?
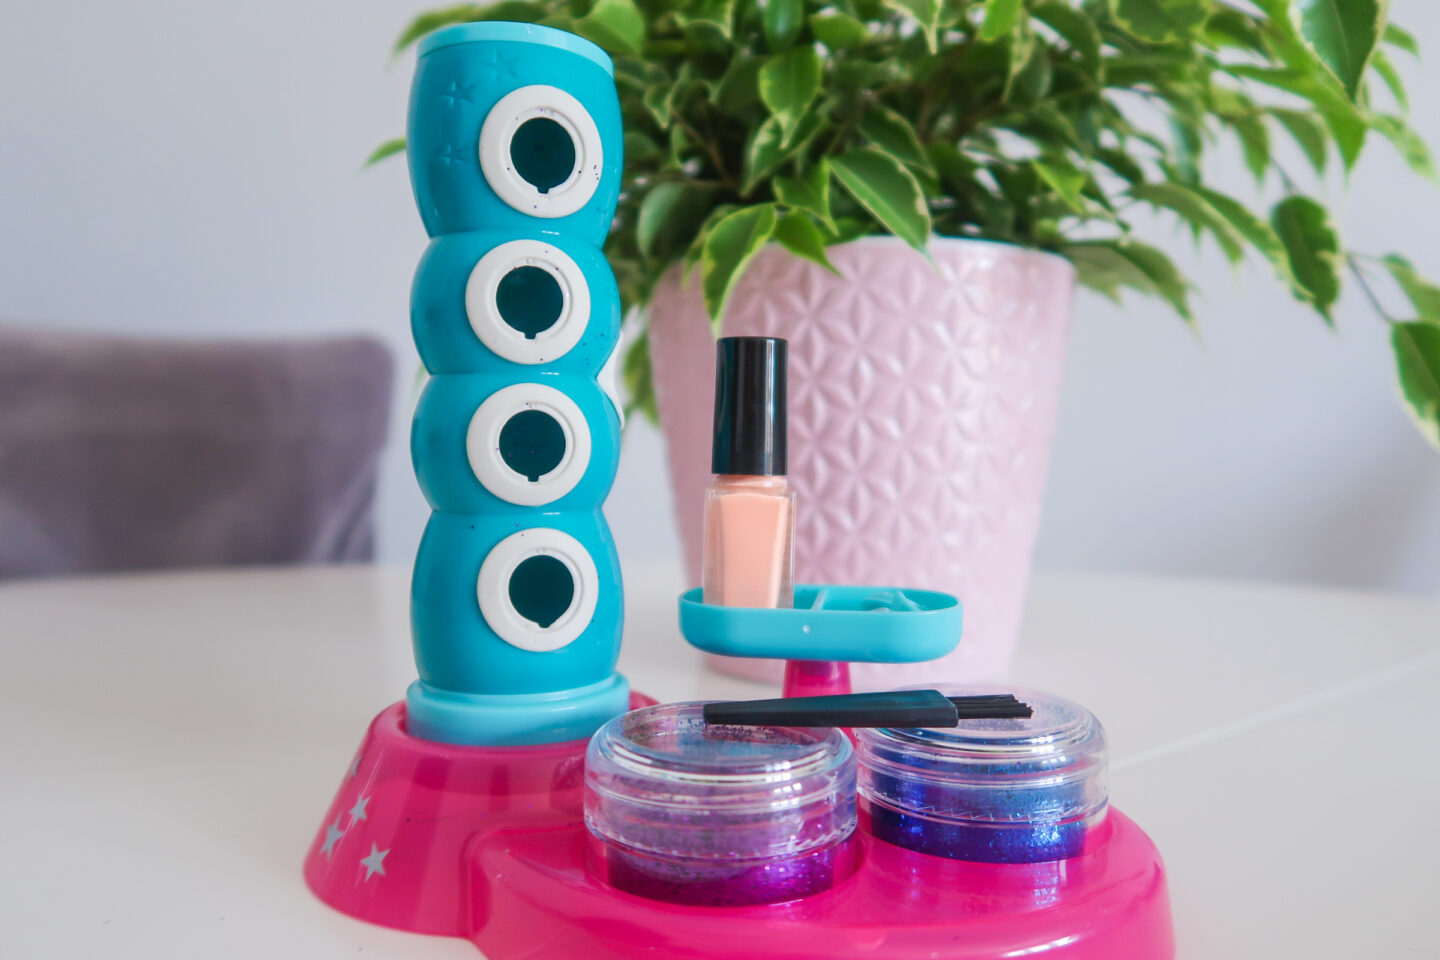
- Nail glitter applicator
- 2 Glitter pots
- Easy peel nail paint
- A little nail brush
- Nail studio stand
- Instruction leaflet
Step by step on how it works
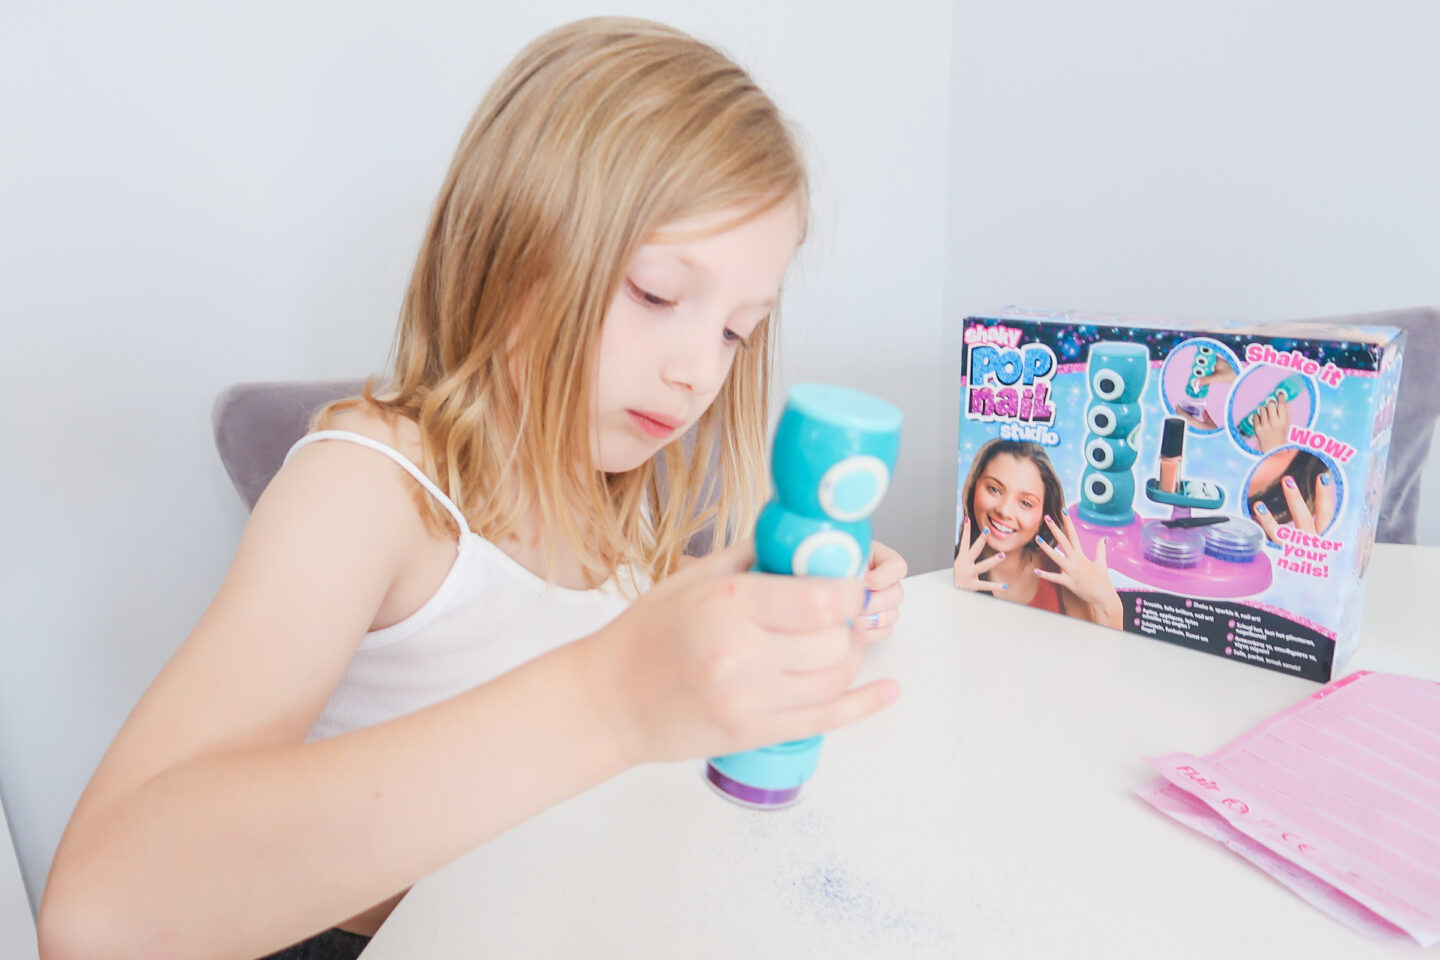
- First of all, take everything out of the box and arrange it on the nail stand provided, so that everything is in one place in front of you, pop out the little buttons that are covering the holes in the applicator and store them on the stand. Unscrew the lids off the glitter and place them back on the stand and then lay some paper down to catch any excess glitter so that you can pour it back into the pot.
2. Decide what nails you want to paint and how you want to paint them. I found that the nail paint dried very quickly so we did two nails at a time. If you are only doing a single nail or two at a time, decide which fingers you are going to do and pop the buttons that you first took out of the applicator, back in the applicator to block off any excess glitter coming out of the holes.
3. Choose which glitter you want and twist it into the bottom of the applicator. This is where the piece of paper on the table to catch any glitter so you can pour it back into the tub is very handy.
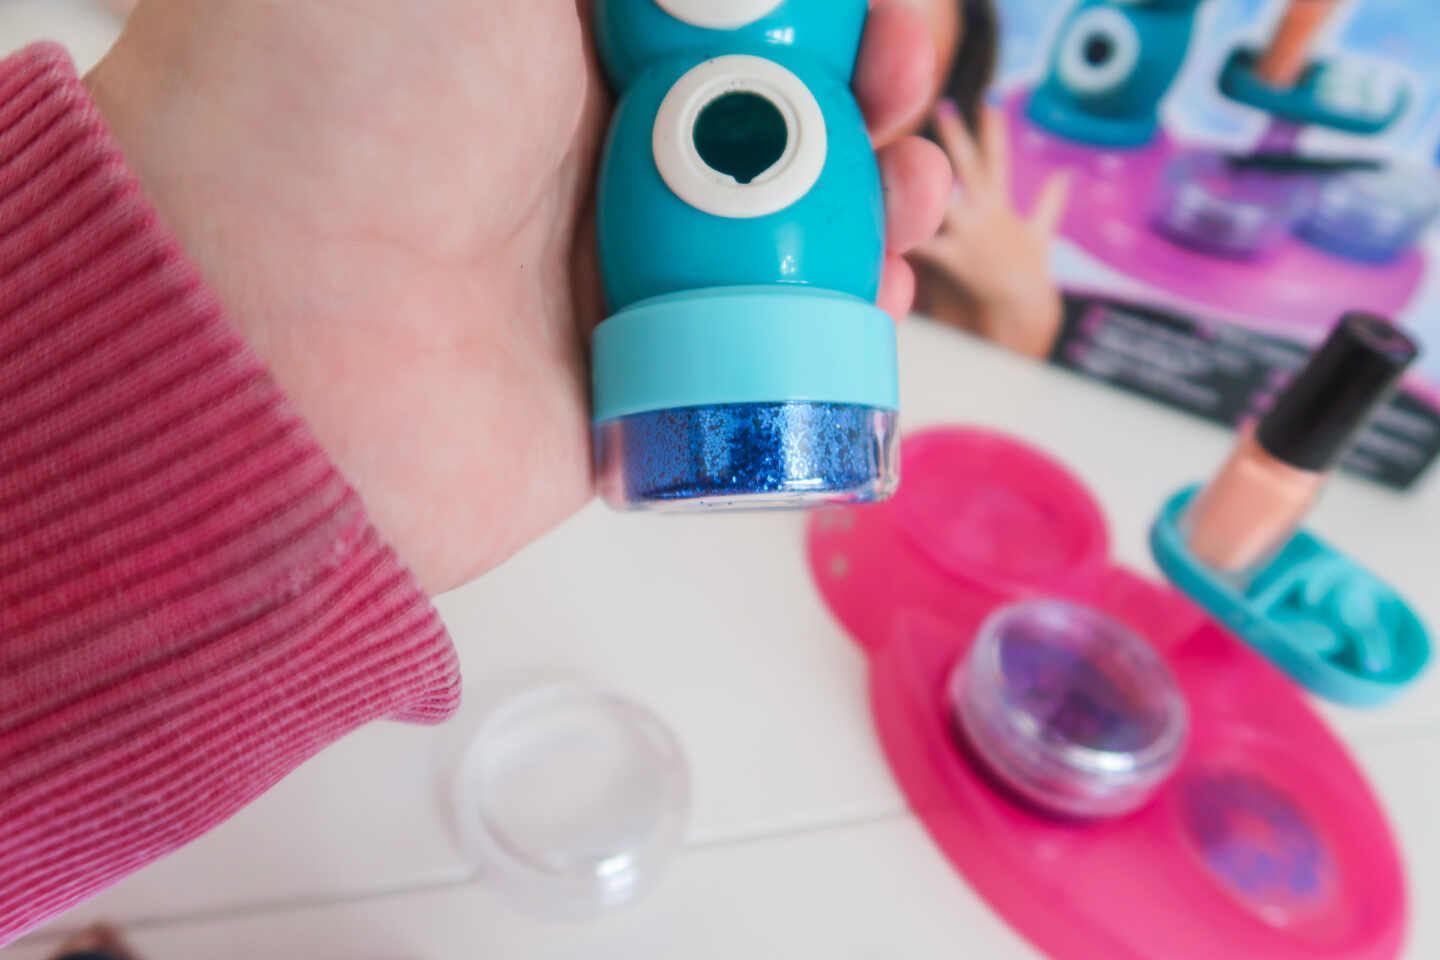
4. Paint your nail/s using the nail paint and then squeeze your finger/s through the holes in the shaky pop applicator making sure they are in far enough to fill any gaps so that no glitter can escape.

5. SHAKE SHAKE SHAKE
6. Take them out slowly being careful not to scrape your new nails. They will look messy at first as the glitter will escape as you pull your nails out and will stick to your skin like glitter loves to do.
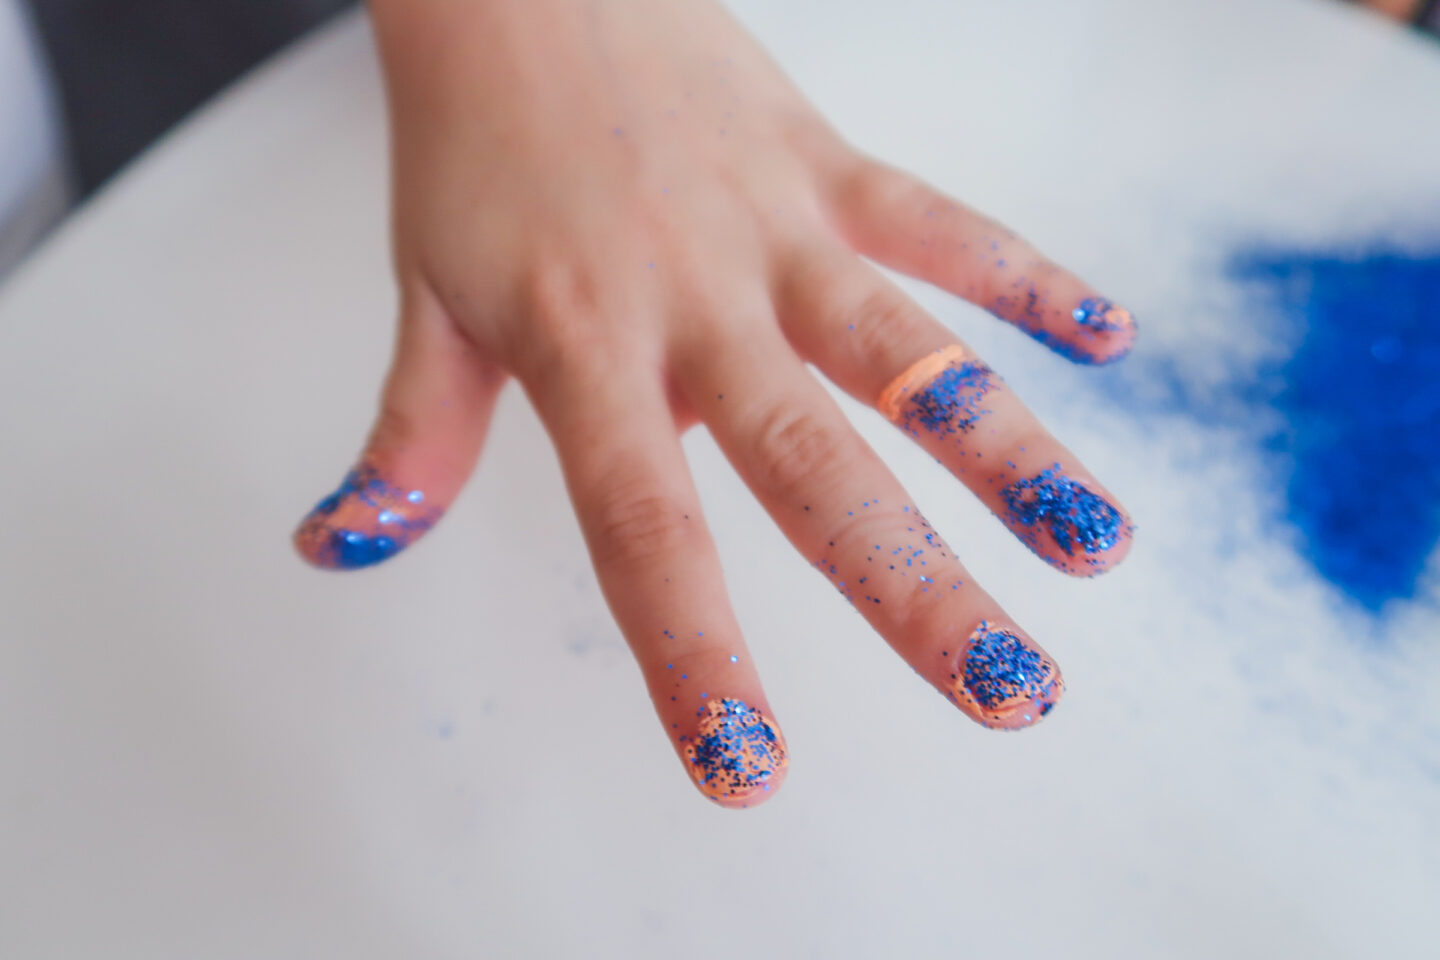
7. Take the nail brush and brush off any extra glitter that is sticking to your skin around the nail to neaten them. The nail paint is easy to peel so if you get that on your skin, you can just peel that straight off.
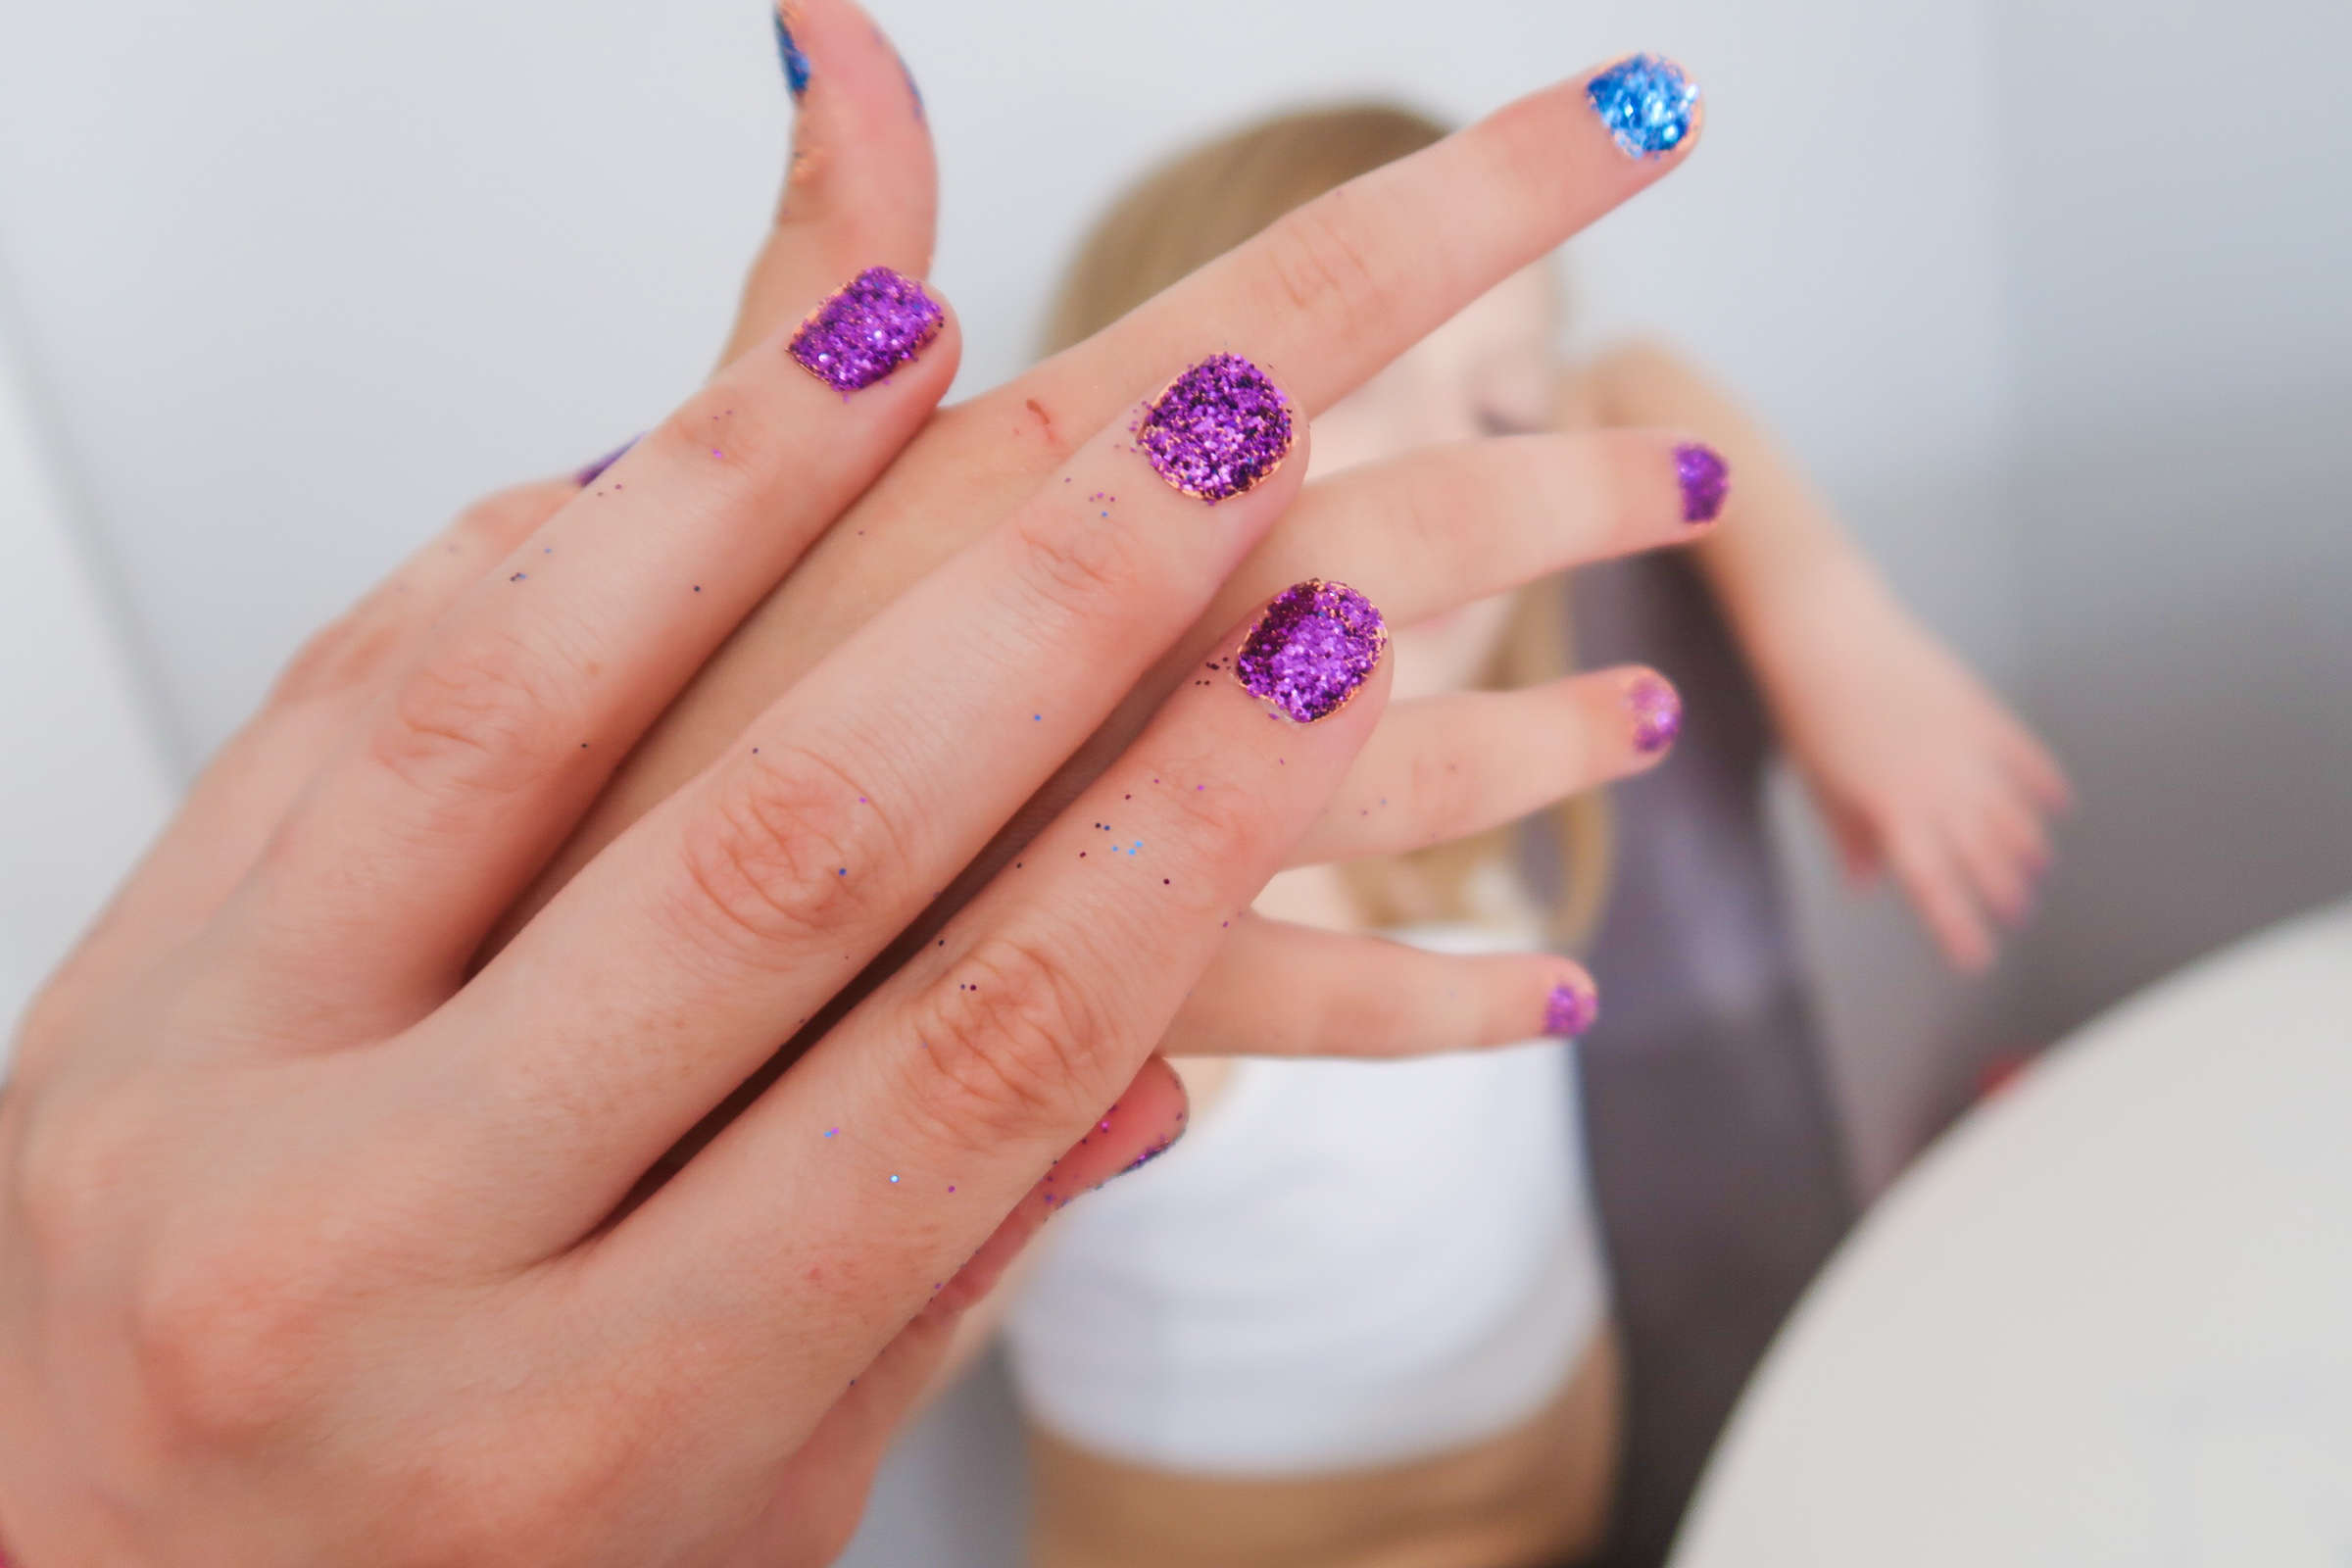
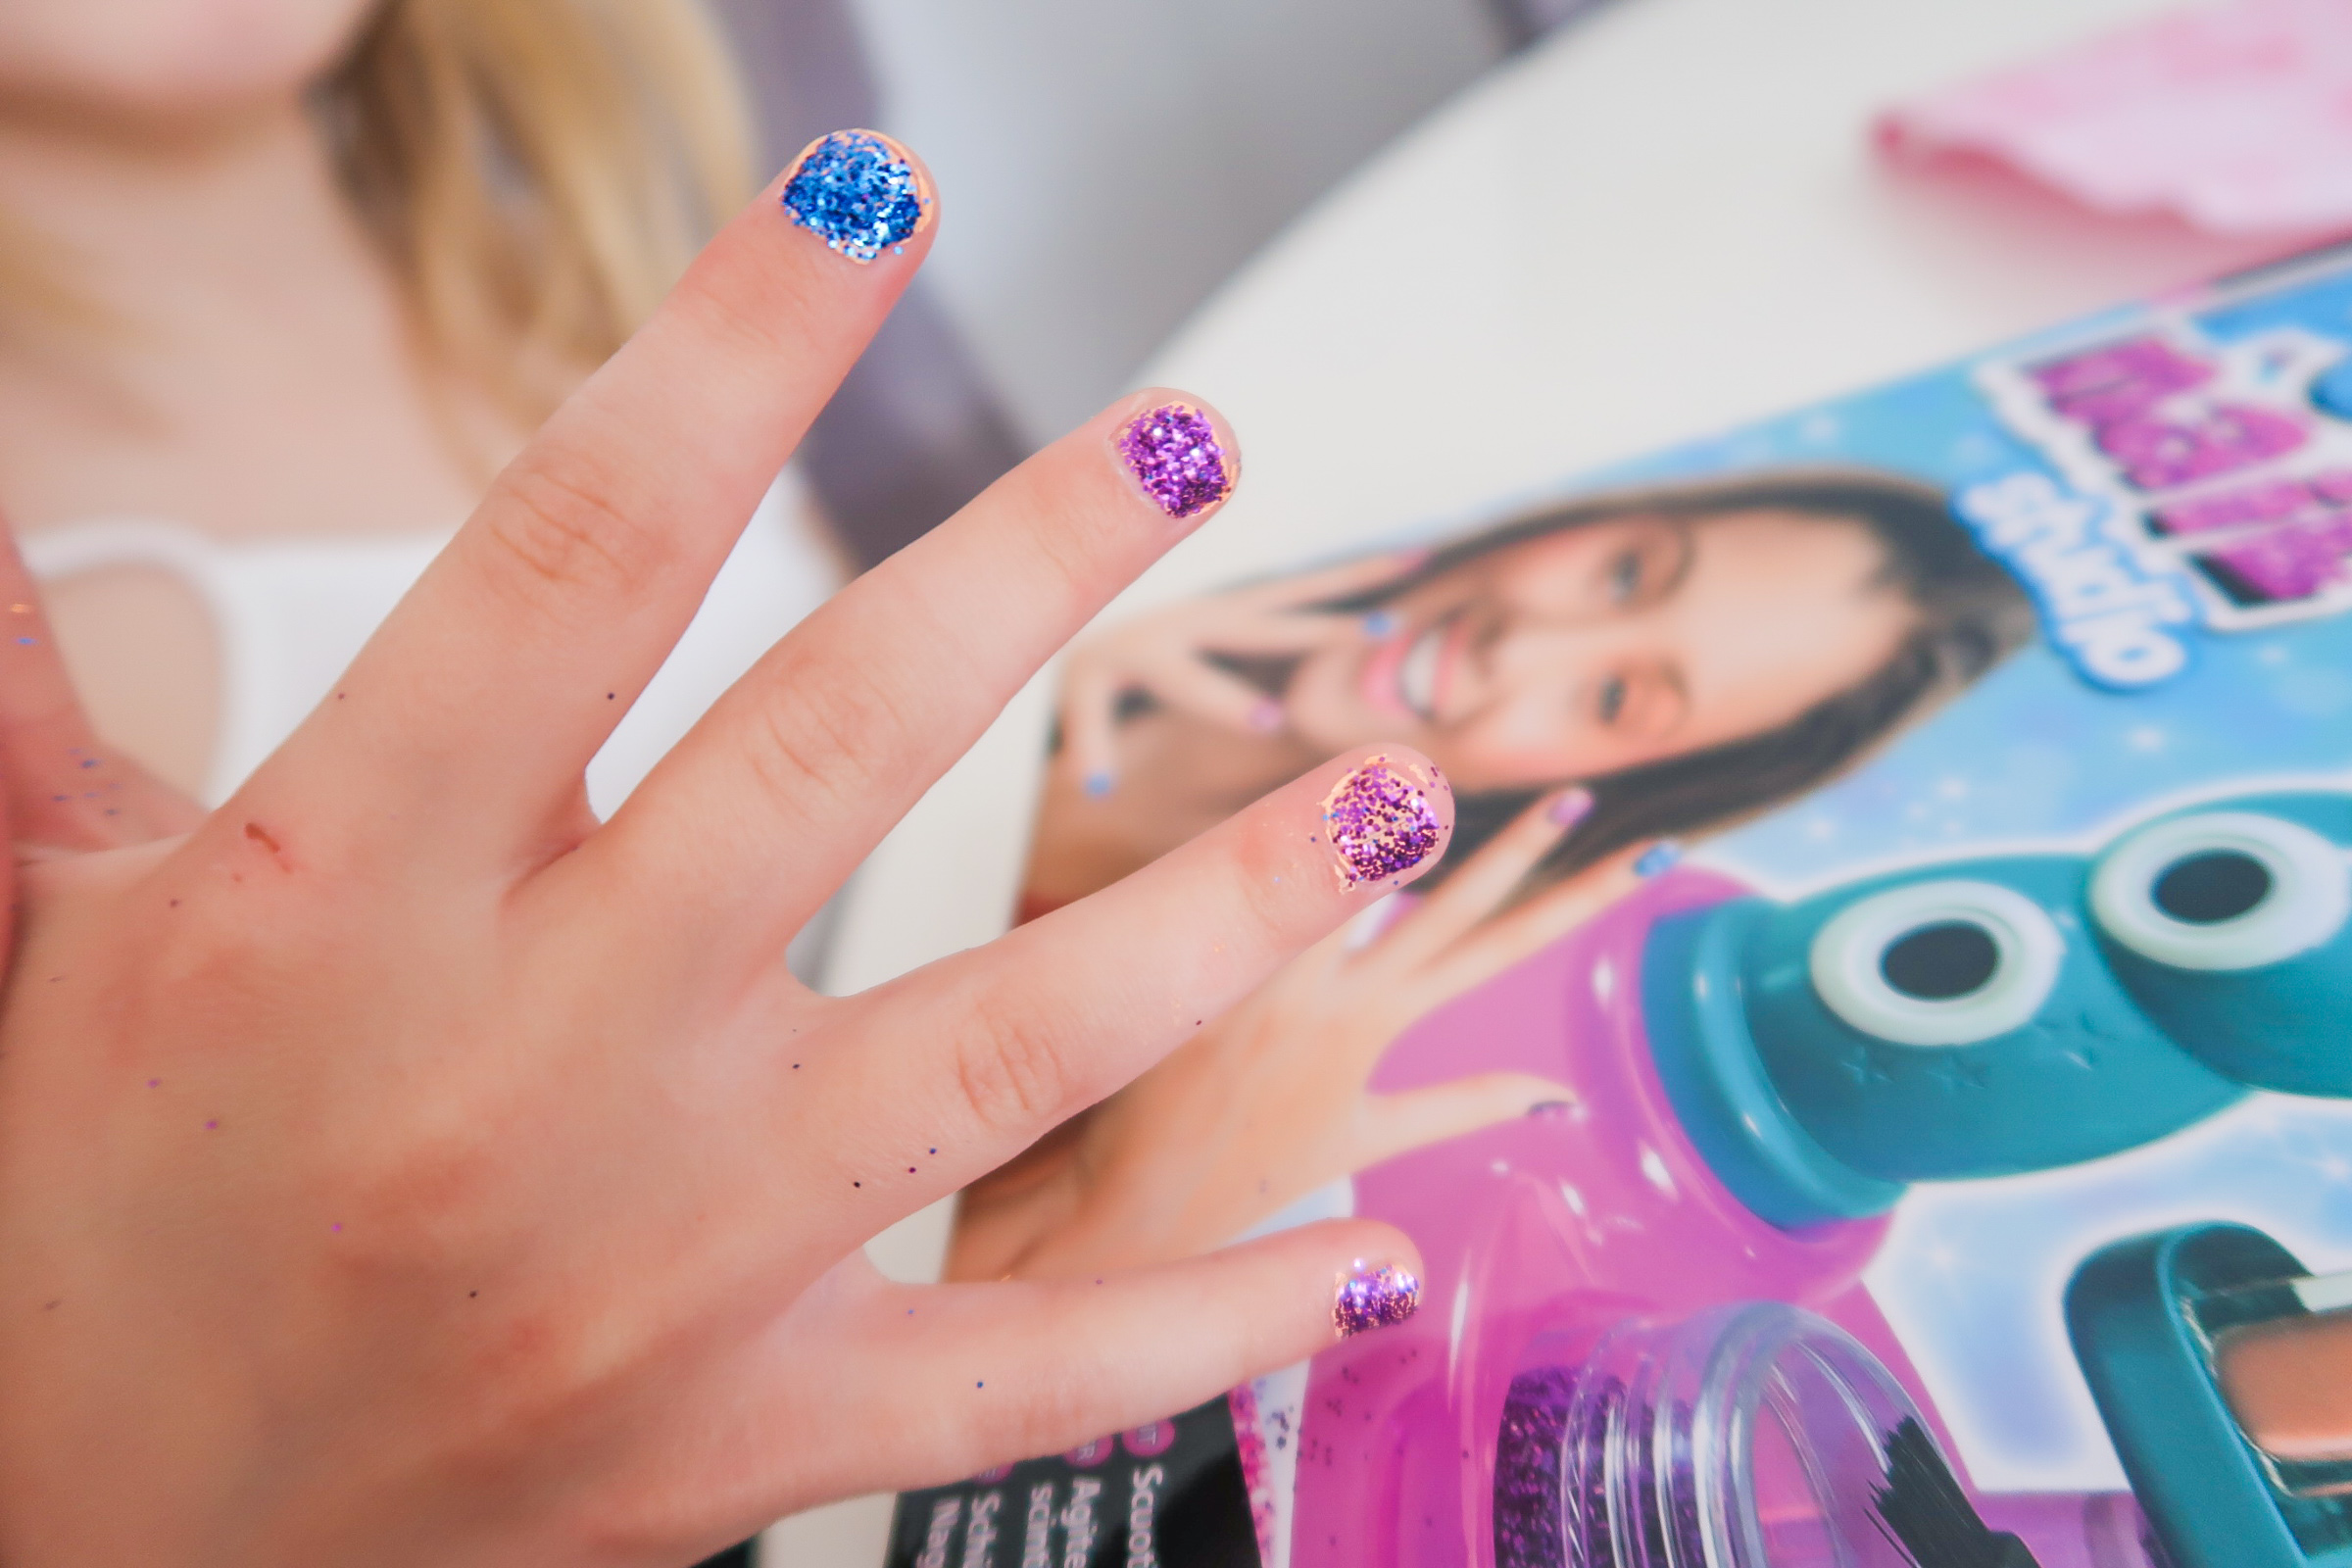

And just like that, you are done, it’s as easy as that. Then you can simply peel them off and reapply again and again.
The Shaky Pop Nail Studio is available to buy from Smyths
